Configure Google DNS
In the previous section we had configure our domain to be resolved by GCP Cloud DNS.
In this section we will configure Cloud DNS to assign the domain to the Kubernetes Cluster load balancer.
On Google Cloud dashboard menu, select Network services → Cloud DNS:
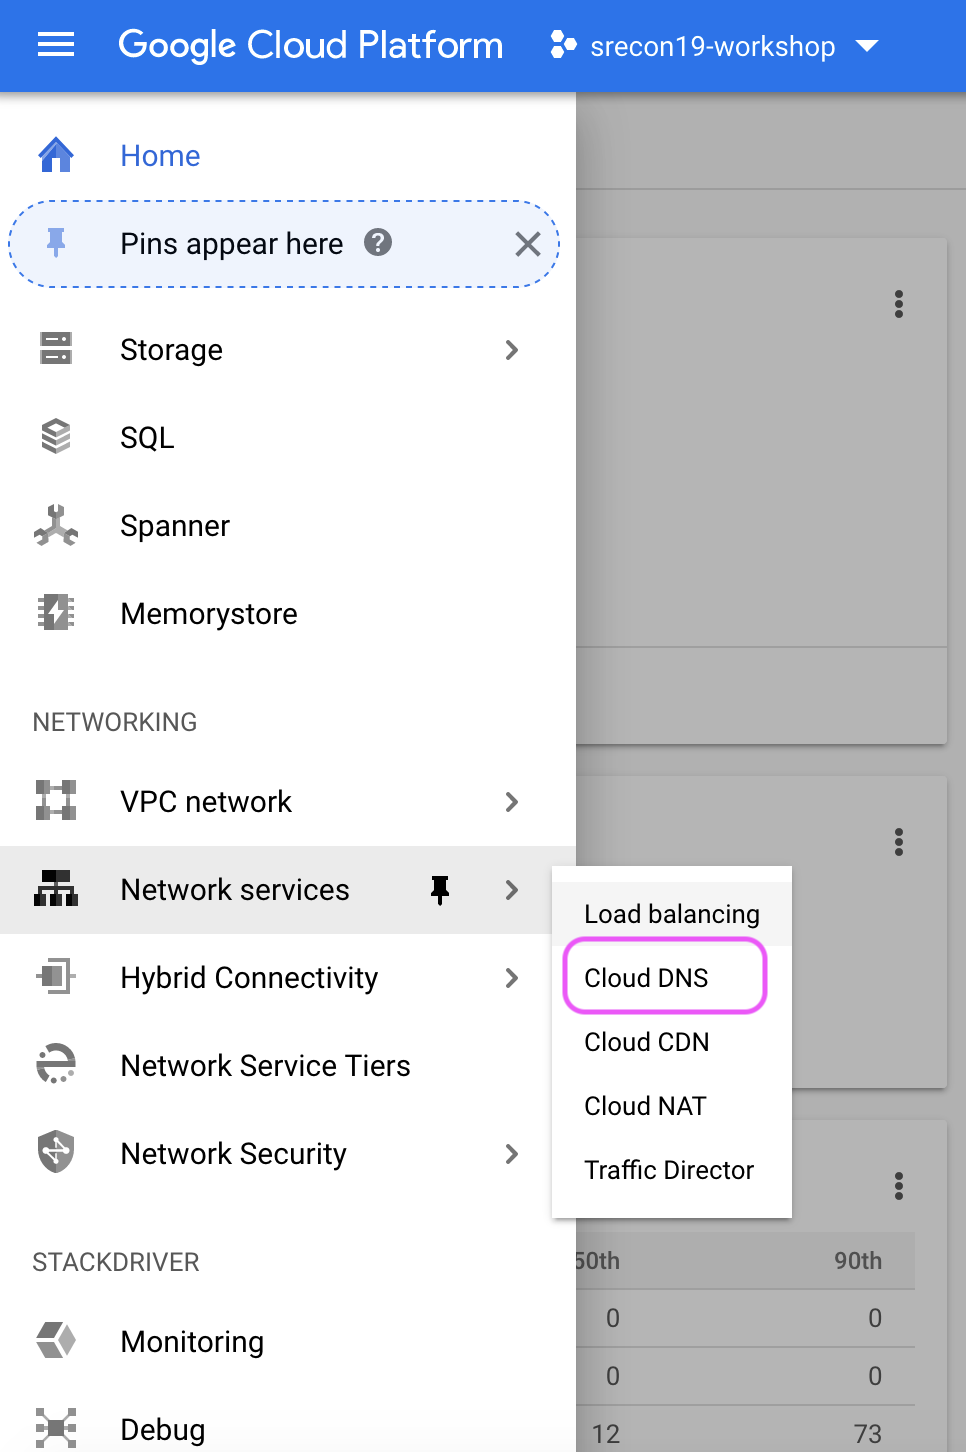
Click on Create zone:

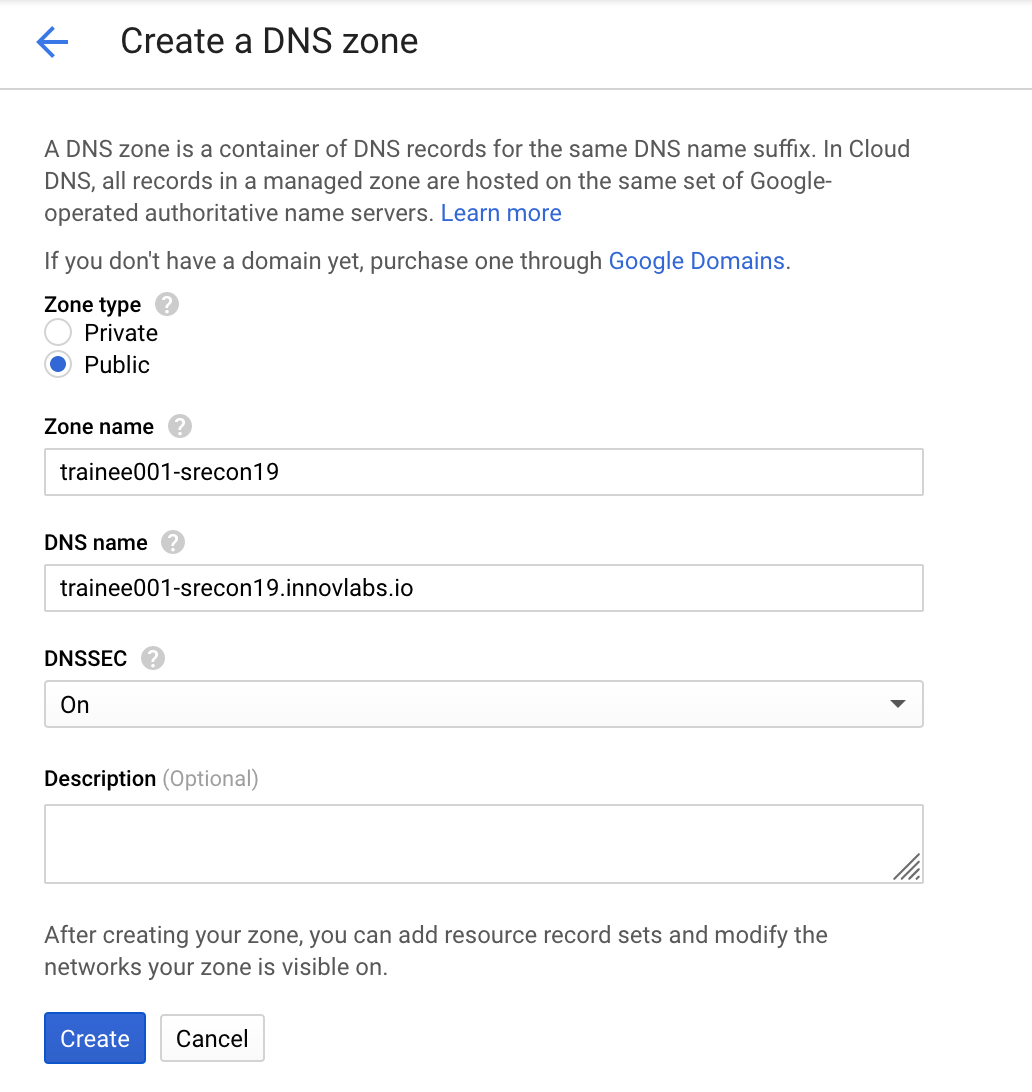
Create the zone with:
- Set Zone type to public
- DNS name: enter the dns name. for the purpose of the workshop we will the Domain
innovlabs.io - Zone name: use the training account as a name or select you cluster name (for example:
trainee001-srecon19) - Set DNSSEC to ON
the click on Create
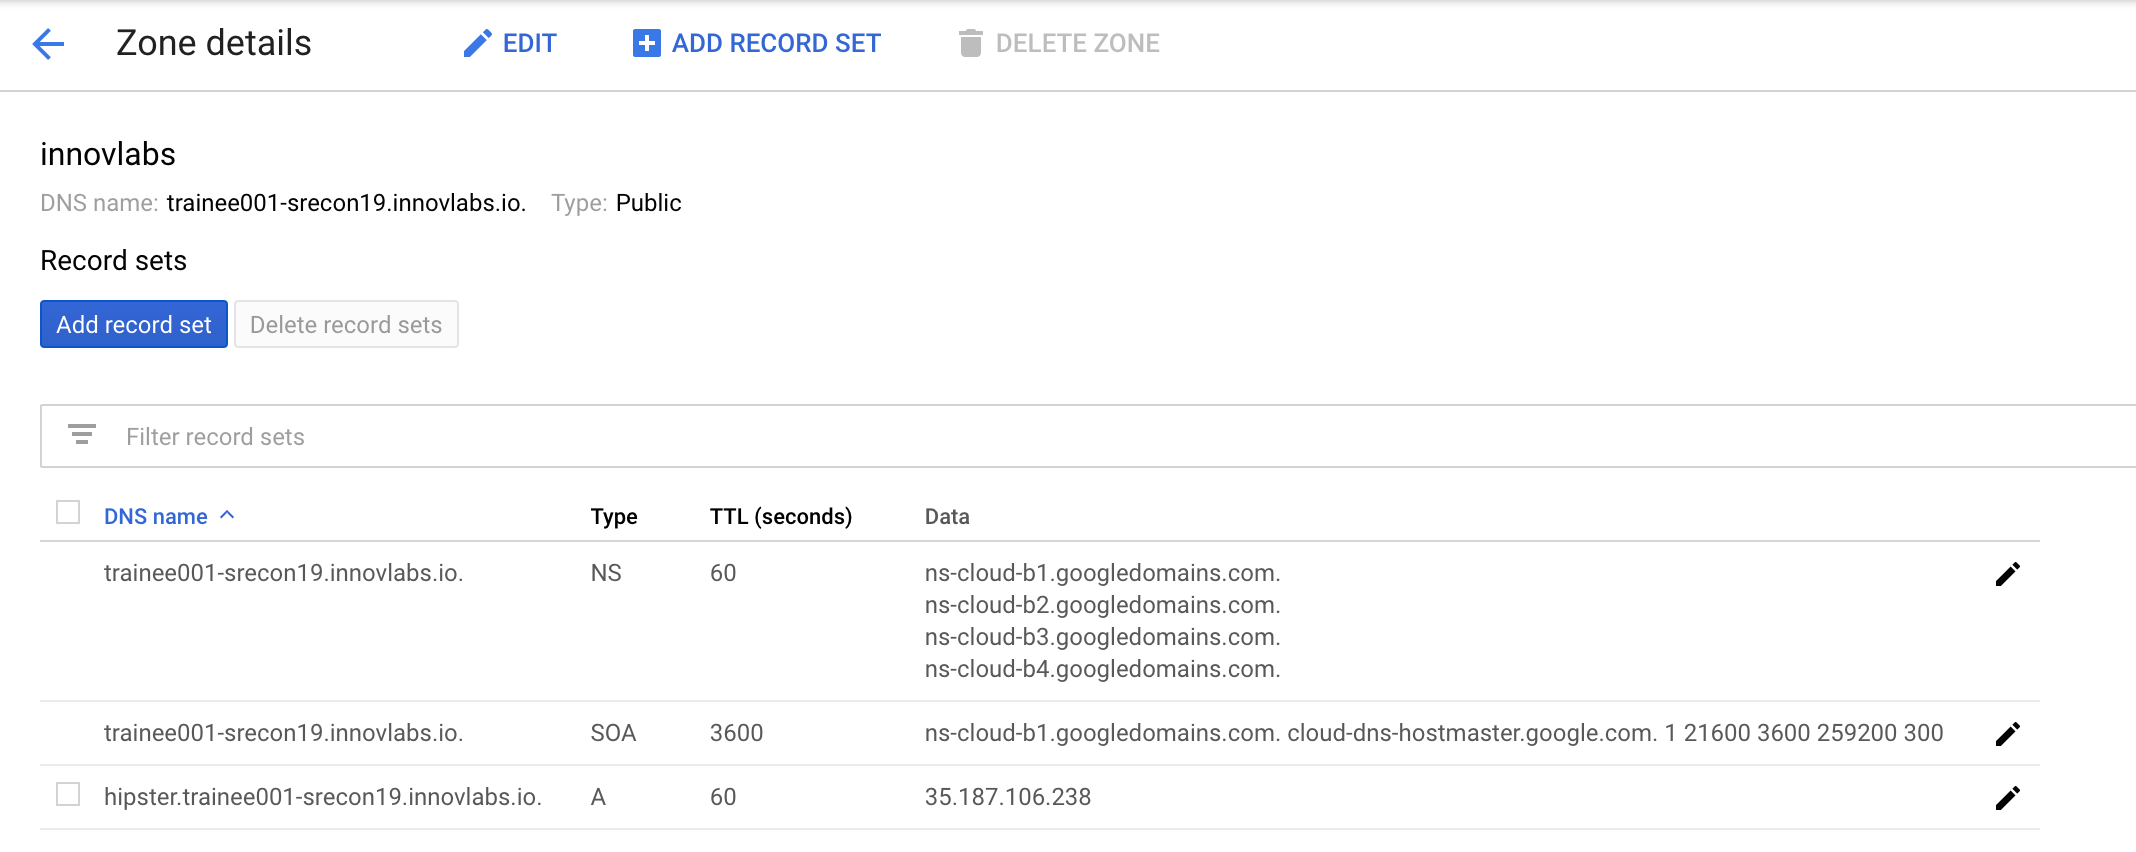
The created DNS zone details should be displayed:
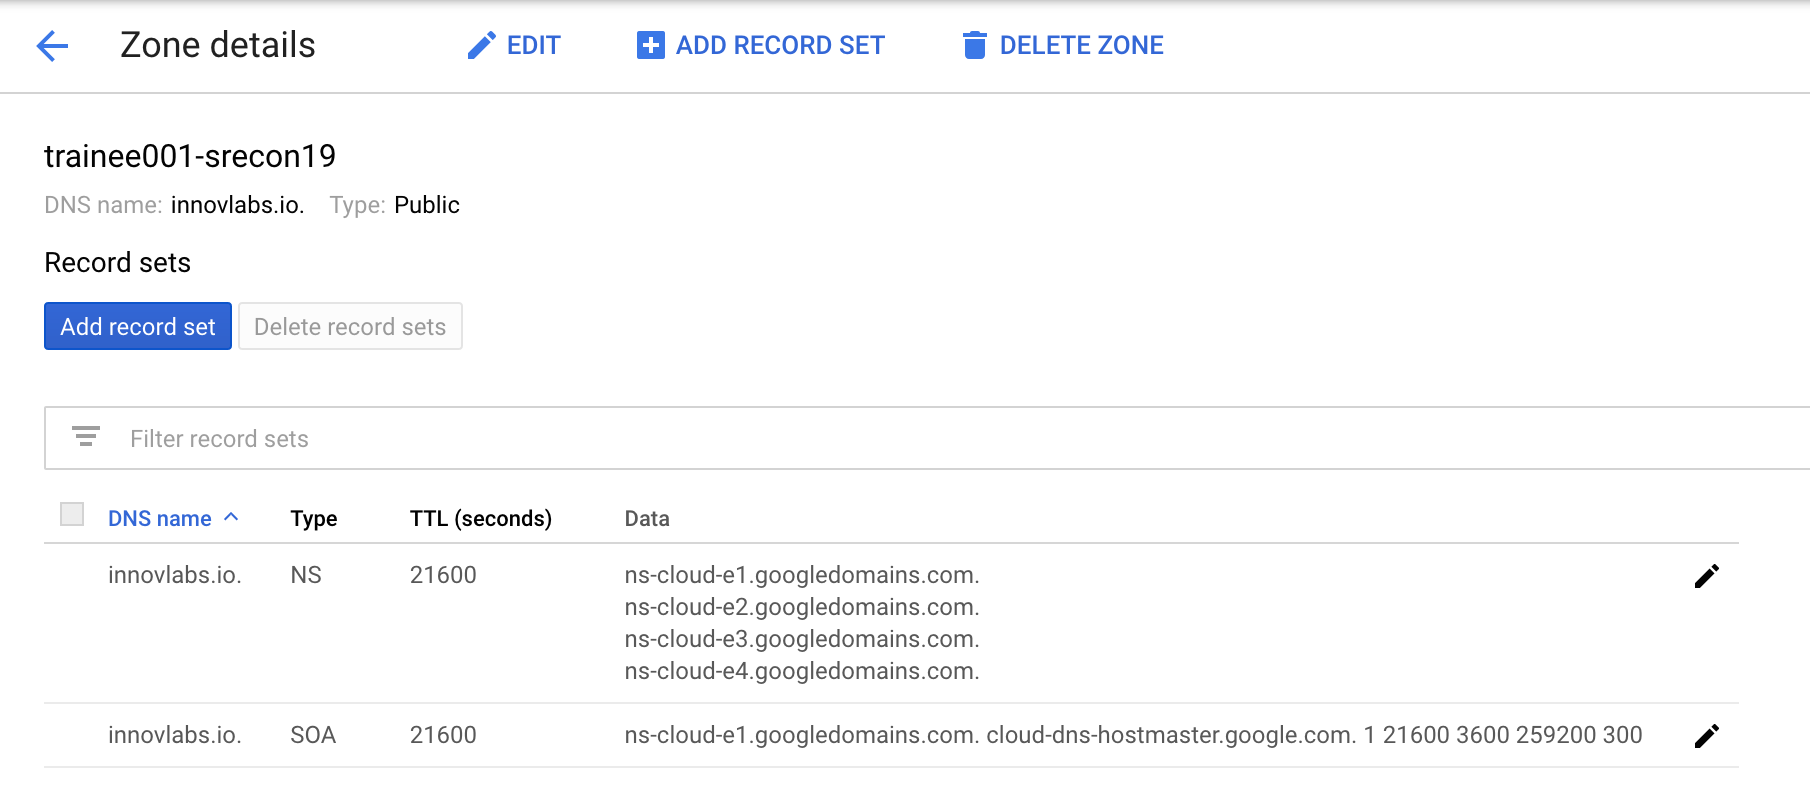
We will add a record set for the hispter e-commerce app, click on Add record set:
- Enter hipster for DNS Name
- Select A from the Resource Record Type menu and set TTL to 1 minute.
- Enter the IP of the Load Balancer previously created for hipster app :
kubectl get service frontend-externalfor IPv4 Address. then Click on Create: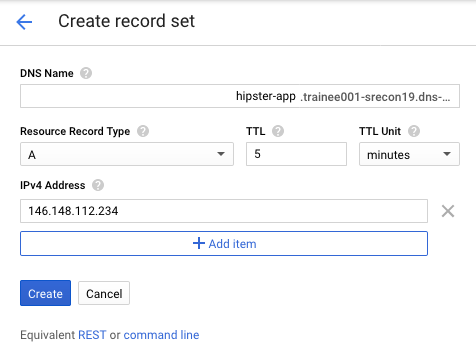 the DNS zone will be updated with the new Record:
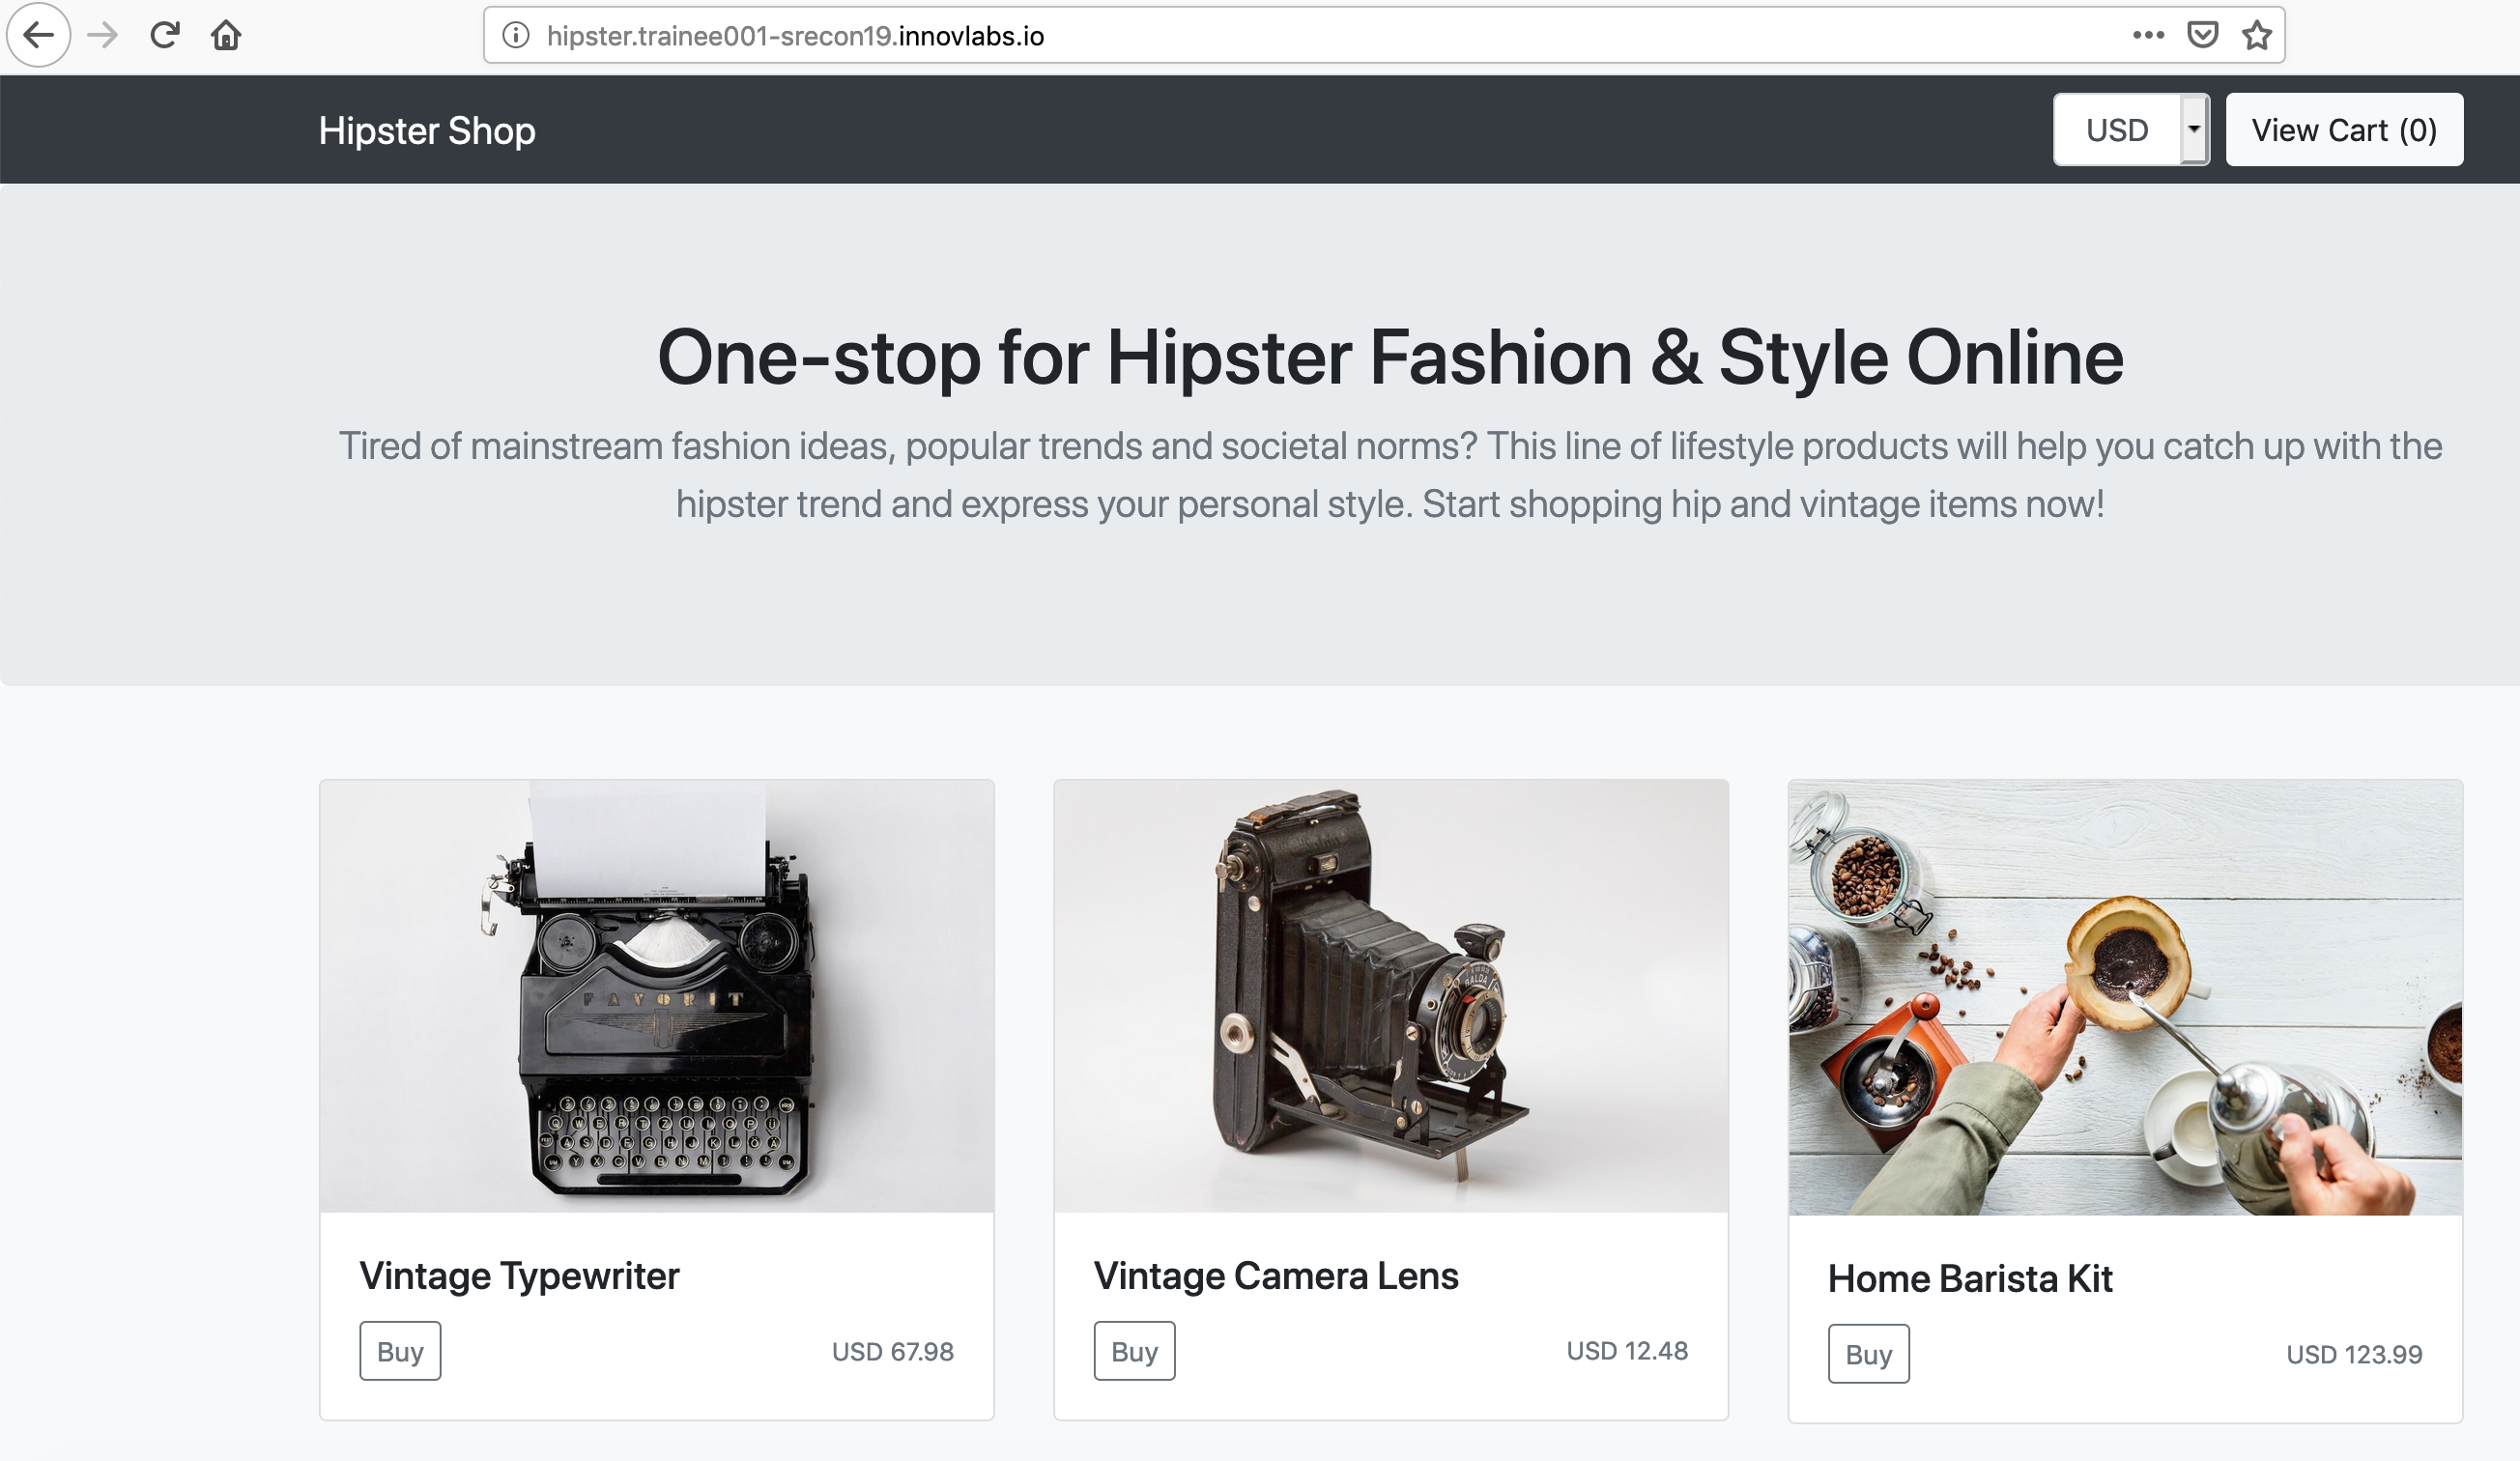
wait a minute to get DNS cache updated and then open the application:
http://YOUR-APPLICATION-DOMAIN/